►Introduction
Keypads are a part of HMI or Human Machine Interface and play really important role in a small embedded system where human interaction or human input is needed. Martix keypads are well known for their simple architecture and ease of interfacing with any microcontroller. In this part of tutorial we will learn how to interface a 4x4 matrix keypad with AVR and 8051 microcontroller. Also we will see how to program then in Assembly and C.
►Constructing a Matrix Keypad
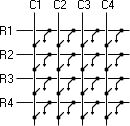
Constuction of a keypad is really simple. As per the outline shown in the figure below we have four rows and four columns. In between each overlapping row and column line there is a key.
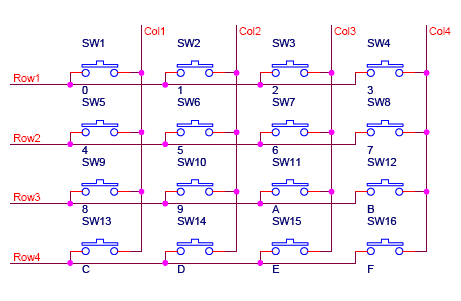
So keeping this outline we can constuct a keypad using simple SPST Switches as shown below:
Now our keypad is ready, all we have to do is connect the rows and columns to a port of microcontroller and program the controller to read the input.
►Scanning a Matrix Keypad
There are many methods depending on how you connect your keypad with your controller, but the basic logic is same. We make the coloums as i/p and we drive the rows making them o/p, this whole procedure of reading the keyboard is called scanning.
In order to detect which key is pressed from the matrix, we make row lines low one by one and read the coloums. Lets say we first make Row1 low, then read the columns. If any of the key in row1 is pressed will make the corrosponding column as low i.e if second key is pressed in Row1, then column2 will give low. So we come to know that key 2 of Row1 is pressed. This is how scanning is done.
So to scan the keypad completely, we need to make rows low one by one and read the columns. If any of the button is pressed in a row, it will take the corrosponding column to a low state which tells us that a key is pressed in that row. If button 1 of a row is pressed then Column 1 will become low, if button 2 then column2 and so on...
Now lets move on to the programming part of keypad in our next section.
Keypads are a part of HMI or Human Machine Interface and play really important role in a small embedded system where human interaction or human input is needed. Martix keypads are well known for their simple architecture and ease of interfacing with any microcontroller. In this part of tutorial we will learn how to interface a 4x4 matrix keypad with AVR and 8051 microcontroller. Also we will see how to program then in Assembly and C.
►Constructing a Matrix Keypad
Constuction of a keypad is really simple. As per the outline shown in the figure below we have four rows and four columns. In between each overlapping row and column line there is a key.
So keeping this outline we can constuct a keypad using simple SPST Switches as shown below:
Now our keypad is ready, all we have to do is connect the rows and columns to a port of microcontroller and program the controller to read the input.
►Scanning a Matrix Keypad
There are many methods depending on how you connect your keypad with your controller, but the basic logic is same. We make the coloums as i/p and we drive the rows making them o/p, this whole procedure of reading the keyboard is called scanning.
In order to detect which key is pressed from the matrix, we make row lines low one by one and read the coloums. Lets say we first make Row1 low, then read the columns. If any of the key in row1 is pressed will make the corrosponding column as low i.e if second key is pressed in Row1, then column2 will give low. So we come to know that key 2 of Row1 is pressed. This is how scanning is done.
So to scan the keypad completely, we need to make rows low one by one and read the columns. If any of the button is pressed in a row, it will take the corrosponding column to a low state which tells us that a key is pressed in that row. If button 1 of a row is pressed then Column 1 will become low, if button 2 then column2 and so on...
Now lets move on to the programming part of keypad in our next section.
No comments:
Post a Comment